mailx邮件客户端发送邮件
本文共 757 字,大约阅读时间需要 2 分钟。
一、安装mailx邮件客户端:
yum install mailx -y二、修改/etc/mail.rc配置文件:
set ssl-verify=ignore
set nss-config-dir=/root/.certsset from=abc@qq.comset smtp=smtps://smtp.qq.com:465set smtp-auth-user=abc@qq.comset smtp-auth-password=qq邮箱授权码set smpt-auth=login三、配置证书:
mkdir -p /root/.certs/echo -n | openssl s_client -connect smtp.qq.com:465 | sed -ne '/-BEGIN CERTIFICATE-/,/-END CERTIFICATE-/p' > ~/.certs/qq.crtcertutil -A -n "GeoTrust SSL CA" -t "C,," -d ~/.certs -i ~/.certs/qq.crtcertutil -A -n "GeoTrust Global CA" -t "C,," -d ~/.certs -i ~/.certs/qq.crtcertutil -L -d /root/.certs四、在自己的qq邮箱获取授权码:
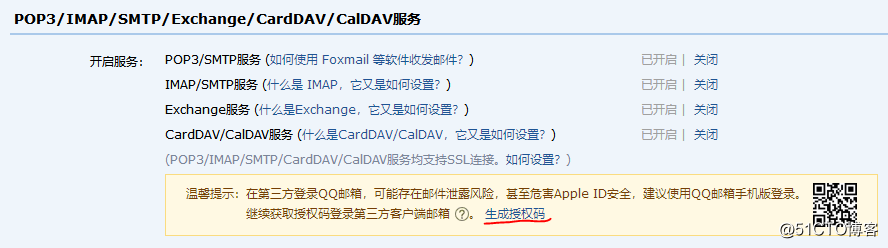
把生成的授权码复制粘贴到第二步set smtp-auth-password=即可。
五、最后发送邮件:
echo "i am victor chen,hi" | mail -v -s "say hello" xxx@qq.com转载于:https://blog.51cto.com/victor2016/2402004
你可能感兴趣的文章
java 多线程简介
查看>>
SQLSserver2008安装默认账户介绍
查看>>
MySQL:NULL?
查看>>
mysql select 结果集循环
查看>>
django返回json的几种方法以及android调用
查看>>
利用JavaScript全选、反选复选按钮
查看>>
js 键盘码对应表
查看>>
MogileFS安装配置实战
查看>>
Java Concurrency(一)
查看>>
centos 7更改网卡名字
查看>>
安装gitlab
查看>>
本季度学习内容
查看>>
Android 权限大全中英对照
查看>>
动态素组(ArrayList)
查看>>
linux下部署tomcat指定JDK版本编译并运行javaWEB应用
查看>>
drbd+corosync+pacemaker实现mysql的高可用性“下”
查看>>
TCP协议中FLAG的含义
查看>>
Navicat for MySQL之HTTP和SSH远程连接数据库
查看>>
Android中 android:layout_weight 属性 完美解释
查看>>
简单文件存储进内存
查看>>